Showing posts with label chocolate. Show all posts

Sunday, May 22, 2011

Mint ice cream with andes chunks and a dear blogger friend


Today I'm gonna tell you about my dearest blogger friend. Her name is Maria and she's the author of Remena Nena. I met Maria over a year ago, when all we had in common was that we were both Spaniards from the same region (Catalonia). Nowadays, she's one of my best friends. 

It all started with a few e-mails here and there. Then a recipe together and lots of conversations on gmail talk. Packages sent back and forth from Boston to Vilanova (Spain). Constant facebook commenting and now our latest obsession, the 'whatsup' application. 

We talk about pretty much anything, congratulate each other on school progress, plot evil plans to feed our friends with tons of sugar, cream and butter and talk about boys (a lot). We laugh, cry, complain, tell secrets and share our stories. 


As I mentioned, there's quite a bunch of packages that have gone from Spain to the US and viceversa in the last year. They have contained things like hazelnuts, sprinkles, baking cups, cookie cutters and the last of Maria's crazy ideas, two ice cream cookbooks. She's a more than generous girl and once she heard I'd gotten an ice cream maker, she couldn't resist sending me 'The Perfect Scoop' and 'Ben & Jerry's Homemade Ice cream and dessert book'. 

I obviously couldn't wait to use them and made mint ice cream from Leibovitz's book. But before I give you the recipe, let me try to convince you that you should check Maria's blog. Because she's just awesome.

Now for the recipe.

Mint ice cream with andes chunks
A bit adapted from 'The perfect scoop'


For the mint ice cream:
1 cup whole milk
3/4 cup sugar
2 cups heavy cream
Pinch of salt
2 cups lightly packed fresh mint leaves
3 large egg yolks
I also added a bit of peppermint extract, because after steeping the mint in the milk, I thought the mint flavor wasn't strong enough. I was wrong and it was plenty once frozen. But, I must say that, even though you wouldn't think so, the result of mixing the two, was quite awesome. The mint leaves gave the ice cream a fresh flavor and the peppermint has a minty aftertaste that makes it amazing to the palate. I added a teaspoon of the extract, however, you can omit this and I'm sure the result will be great. 
For the 'chunks':
8 Andes chocolate mints chopped 
To make the ice cream:
In a pan, warm up the milk, sugar and mint. Once the mixture is steaming, cover with a lid and let the mint steep in the milk for 1hr. I'm not sure you can appreciate it, but my milk was slightly green afterwards.

Strain the mint from the milk and bring it back to the pan. While warming up the milk, beat the three egg yolks in a bowl. Once the milk is hot, add the milk mixture to the eggs while continuously whisking. Then bring the mix to the pan and cook until it's thick enough to cover the back of a spoon (or a few minutes at 175 F). Add the heavy cream to the mixture and let it cool in the fridge for at least an hour before freezing. Freeze according to your ice cream maker manufacturer instructions. Once the mix is frozen, add the chopped andes and let the ice cream harden in the freezer.


Tuesday, March 29, 2011

Birthday cake and the 100th post


Wow. I made it to the 100th post. I must admit that the frequency of posting has been quite low lately, but grad school doesn't leave much time for more. I have indeed been baking quite a lot, there's just no time for pictures or posts, which, believe me, I'm really sorry about.

This delicious cake wasn't made to celebrate the 100th post or my own birthday, it was the celebration cake for my labmate and friend Chris. He made it clear, chocolate cake with chocolate frosting. So that it is. A simple, moist and delicious cake, with just a few great ingredients and that you can make in no time.


The chocolate cake is from Hershey's and the frosting was a homemade concoction. You can bake it in layers, squared, round, whatever you like. I even considered putting some marshmallows on top and torching them. (Too bad I ran out of gas). I think you'll enjoy it. 

Chocolate cake

2 cups sugar
2 sticks of butter
3/4 cups cocoa powder
1 3/4 cup all purpose flour
1 1/2 teaspoons baking powder
2 eggs
1 cup milk
1/2 cup vegetable oil
2 teaspoons vanilla extract
1 cup of freshly brewed hot coffee (the original recipe calls for a cup of boiling water).


Cream the butter and sugar and add the vanilla extract. Mix in the eggs and oil. In a bowl, combine the dry ingredients. Alternate the addition of dry ingredients and milk, beginning and ending by the dry. Bake for about 35 min at 350 F.

Chocolate frosting


1 stick of butter
1 1/2 cups powdered sugar
1 teaspoon vanilla
1/2 cup cocoa powder
1/2 cup milk

Cream the butter until very fluffy, add the vanilla, powdered sugar and cocoa powder, finally add the milk until the frosting is creamy, you might need less than 1/2 cup. Use the frosting the same day is made.

Wednesday, February 2, 2011

Homemade thin mints and my students


I'm gonna repeat myself. Just because I know I've already mumbled about teaching and students and such things. Well, you know, when you're a PhD student, life is quite limited to labs, classes, teaching and a little bit of fun social life.

Truth is, teaching is a big part of what I want my future to look like. Professor Bon? hopefully!. In the meantime, I devote my Monday and Wednesday nights to teaching general chemistry. It's certainly an interesting experience. You know those shows about colleges (like Community), in which there's a character who is the stereotypical student of some kind? I have them all.

There's the ones who are in college just because mum and dad wanted them to be, there's the mom with two kids who goes to school full time while she works full time, there's the already PhD who is back in school because he wants to go to med school. Prom queen, army guy, funny guy, dorky boys. I've had them all. And they are all great in their own way. 


Teaching is probably the most rewarding experience one could have. It's also one of the toughest ones. When T.A evaluations come, you see nasty comments (probably from that one student who yelled at you in class and called you an idiot), that make you feel terrible.  Just until you read the good ones. Those make it all worth it. The long hours of grading, the class preparation, the late nights teaching when you've been at work for over 12 hrs. It all pays off.

Today I was having a terrible day. One of those in which everything seems terrible. Then a few of my students tried to make me laugh. They tried really hard, goofing around and cracking jokes. And by the end of lab, I was in the best mood I've been in, all week.

Teaching is as good as these cookies. The home made version of the infamous girl scouts cookie, but cheaper, healthier and tastier. My friend Chase loves them to death. Since we pounded an entire box while playing cribbage a few days ago, I decided to make him a batch. He loved them and so will you.

Homemade thin mints

For the cookies
8 ounces/1 stick of butter
1 cup of powdered sugar
1 teaspoon of vanilla extract
1 cup of cocoa powder
3/4 teaspoon of fine grain salt
1 1/2 cups of all-purpose flour

For the chocolate coating
12 ounces of chocolate chips
Peppermint extract


Cream the butter, vanilla extract, salt and powdered sugar. Add the cocoa powder and mix well. Finally stir in the flour and mix until just combined. Don't overmix or your cookies will be hard. Place the dough in the freezer for about 30 min. Then roll it between two pieces of parchment paper, to about 1/8 in thickness. This dough is soft. My kitchen was hot and it kept getting too soft to cut and place in the baking sheet without it getting weirdly shaped. To prevent that, I rolled the dough and put it in the freezer for about 2 min before cutting shapes with the cookie cutter. That way they kept shape and were easier to handle. Also, you want to roll a bit of dough at a time, or again, it'll get soft and it'll be hard to handle. 
Bake the cookies at 350 for about 10 minutes or until you can smell them. They burn fast, so be careful.

Once the cookies are baked, let them cool completely so they harden, otherwise they'll break when you try to coat them (10 min in the freezer will shorten the cooling time). Melt the chocolate in a double boiler and then add the peppermint extract to your taste. You don't want to add it before since heat could alter the flavor (this doesn't happen with oils, only extracts) . I'm a big fan of microwaving chocolate, but you want to keep it warm while you coat the cookies and a double boiler works best for that. Dip the cookies one at a time. I still have to perfect the coating technique. I threw them in the chocolate, coated both sides and then using two forks, removed the excess chocolate (specially the one that sticks at the bottom). It's a matter of practice, my first cookies were extremely coated. Place the coated cookies in a piece of parchment paper and let them cool so the chocolate hardens. Once again, the freezer does the trick in a few minutes. Store in the fridge to prevent the chocolate from melting.

Thursday, July 1, 2010

Boston cream pie cupcakes and farewells


My two best buddies, A and T, who I had the pleasure to work with for a year in my ex-lab at MIT, are leaving. They are both gonna be professors next year. Professors, can you believe it? My buddy buddies. The ones who I used to drink scotch every Thursday in the lab. Breaking you don't wanna know how many rules. The same ones who gave me the nickname of  'The Spaniard'. These two people who have been pretty much my family ever since I moved to Boston. They are gonna be professors in top universities next year.

I am leaving too, and for those who asked,  I'm moving to Portland, OR, to pursue a PhD. I cannot put into words how much I'm gonna miss them. For their farewell party in the lab, I wanted to make something special. Something that would remind them that Boston will always be a place where we spent a great time together.


If there's a dessert that speaks Boston, that's our famous cream pie. I knew that had to be my dessert. The problem? Carrying a creme filled, chocolate covered cake in this heat and humidity, sounded like a nightmare to me.  Filled cupcakes are an easier option and reduce the risk of arriving to the party covered in chocolate and pastry cream.

These cupcakes are soft, vanilla flavored, not exactly the traditional genoise that belongs to the Boston Cream Pie, but certainly pretty close. If you read often you'll know that I'm a huge fan of pastry cream and ever since I made it for the first time, I haven't been able to stop. It certainly is my favorite part of this cupcakes. To top them, some cute piped ganache. All in all, really good cupcakes that didn't last too long. 


Boston Cream Pie Cupcakes


Printable version

Vanilla cupcakes adapted from Amy Sedaris

Makes 24

6 tbsp unsalted butter
1/2 cup sugar
1 large egg
2 tsp. vanilla
1 1/2 teaspoons baking powder
1 1/4 cups flour
1/2 cup milk (I used soy milk)

Preheat your oven to 350 F

In a bowl, sift together the flour and baking powder and set aside. In another bowl cream butter and sugar. Add the vanilla extract and the egg and mix until combined. Alternatively with the milk, start adding the flour mix 1/3 cup at a time. Starting and finishing with the flour. Fill the baking cups half way (believe me, they get pretty and big) and bake the cupcakes for 15-20 min until a toothpick inserted in the center of the cupcake comes out clean.

Pastry cream
Better if made a day in advance, makes enough for the 24 cupcakes

3 egg yolks
2 tablespoons corn starch
1 cup of milk
1 1/2 cups light cream
1 tablespoon sugar
1 tsp vanilla extract

Bring milk, cream and sugar to a boil in a saucepan. In the meantime, whisk together the egg yolks, the cornstarch until the mixture turns pale and forms ribbons. Once the milk mixture boils, turn off the heat. Take a tablespoon of the milk mix and add it slowly to the egg mixture while whisking it. This will help temper the eggs, that is, bring them to the right temperature so they don't curdle when you add the rest of the milk. Now start whisking the egg mixture and add, all at once, the milk and cream. Keep mixing until you have a homogeneous mixture and then return the liquid to the saucepan. Heat the mixture until it comes to a boil. I kept cooking for about 3 minutes after that. Keep in mind, the longer you cook it, the thicker the cream. Just remember to keep whisking the cream during the whole process. You can flavor the cream by adding a couple teaspoons of vanilla extract. If you do so, add it always at the end, with the heat off.


Ganache

6 oz unsweetened chocolate
1 cup light cream

Chop the chocolate in small chunks. Heat up the light cream until right before it comes to a boil. Pour the hot cream over the chocolate and stir until dissolved. Let it sit in the fridge until the texture allows you to spoon it.

To assemble

Using the cone method, fill the cupcakes with cream. Then decorate the tops with the ganache, using a star tip. Keep in the fridge until about 15 minutes before serving


One last thing! A few days ago I got another award for the blog, this one from Carmen at Dulces Bocados, check her out, she makes beautiful concoctions of all kinds. This award is to demonstrate appreciation for those bloggers who try to pass on cultural values and to promote relationships between them.

I'm gonna pass the award to a few blogs... The award goes to Maduixa, Maria, MerceDolores and Kike and Txell. I highly recommend you visit their blogs.


Monday, June 14, 2010

Hazelnut chocolate swirl bread


Lately I've been thinking about food a lot. Well, that's not really surprising. But I've been having serious conversations with myself about it. Ugh, that sounds weird. Let's start again. Lately I've been having deep, elaborate thoughts about cooking, baking and food itself. About how what I put in my mouth affects my moods, my body and my health. That's more like it. 

I look back a couple years ago and realize I've changed a lot the way I eat. I've never been one for packaged stuff like Ding-dongs or Twinkies, in fact I find them really gross. Nor am I miss butter-y girl either. I don't cook with butter and I try to reduce amounts of it in baked goods. You could say I don't like greasy stuff, even if I really enjoy well made fries. But still, a year ago, you could find me devouring, quite often, all the baked goods that my roommate brought from the bakery she worked at. Indeed they were fine pastries, cakes and cookies, but the sugar levels were sort of scary.


I'm done with sugar comas. I enjoy dried fruits more than I enjoy candy (although I do eat gummy bears every so often), I like raw sugar much better than the refined one and I'm definitely not into buttercream frosting. I also use and abuse whole grains on a daily basis and try to stay away from anything pre-made or pre-packaged, even the bread. Call me a freak if you wish.

This bread is the result of those two years of changes. Of how much I enjoy a freshly baked loaf of home made bread, be it sweet or not. This bread has the perfect amount of sweetness, the creaminess of the chocolate and the crunch from the hazelnuts. The  hard crust prevents it from drying and keeps all the flavor inside. A great substitute for those of you who could die for a toast with nutella. The perfect sunday morning breakfast.


I baked this one along with a cinnamon swirl bread soon to come. I plan on baking many more breads in the future, I'm even toying with the idea of a 'one bread a week' sort of thing. I'm also moving towards more elaborate pastries, cookies and others. I feel like I need to use more with fruits in season in my baked goods, along with almonds, hazelnuts, sesame seeds, honey and other natural sources of flavor. Stay tuned folks, nothing bad can come out of this!

The recipe is a remake from the cinnamon swirl raisin bread from the Bread Baker's apprentice. I left the same basic dough but took out the cinnamon and added chopped hazelnuts and chocolate. I also changed instant yeast for active dry yeast. Since the recipe yields two loaves, I made another one braided and with cinnamon, no raisins. Coming soon!

This bread was sent to the Bread Baking Day event of this month, breads with nuts! You can find it here


Print this recipe

3 1/2 cups bread flour (16 oz)
4 teaspoons sugar
2 1/2 teaspoons (1 packet) active dry yeast
1 large egg beaten
2 tablespoons butter melted
1/2 cup buttermilk (you can substitute for whole milk)
3/4 cup lukewarm water
1 cup hazelnuts, chopped
1 cup bittersweet chocolate, chopped

Dissolve the yeast in the 3/4 cups of water and add a teaspoon of the sugar. Let it sit until the yeast 'wakes up' and doubles in volume. In the meantime, combine flour and sugar in a bowl and separately, melt the butter. Make a well in the center of the flour and add the yeast, mix until combined. Add the egg, buttermilk and butter and mix until the ingredients come together to form a ball. Place the ball in a floured surface and knead for about ten minutes. Place the dough in a greased bowl and let it rise overnight in the fridge or for about 2 hr at room temperature (proofing in the fridge gives depth of flavor).

Once doubled, split the dough in half. Roll each ball into a rectangle about half an inch thick. Spread the hazelnuts and chocolate and roll the dough like a swiss roll. Starting on the longest side of the rectangle. Tuck the ends of the dough underneath the rest and place it in a loaf pan. Let it rise for an hour. Brush the top with egg wash and sprinkle with more hazelnuts.

Bake at 350 F for 40 minutes rotating the pan half way through the baking time. The bread is done when it makes a hollow sound if thumped.

Friday, May 14, 2010

Mocha birthday cupcakes


You might have guessed from the title that I made these beauties for a birthday. My friend Laura was turning... whatever... it was her birthday. Laura is Italian and if there's one thing we both miss from home is good old real coffee. (Sorry, american coffee is not the real deal for us, don't get offended).

So come her birthday, I knew there had to be coffee in whatever I baked for her.  She requested chocolate as part of whatever I made. Chocolate + coffee? Mocha cupcakes!

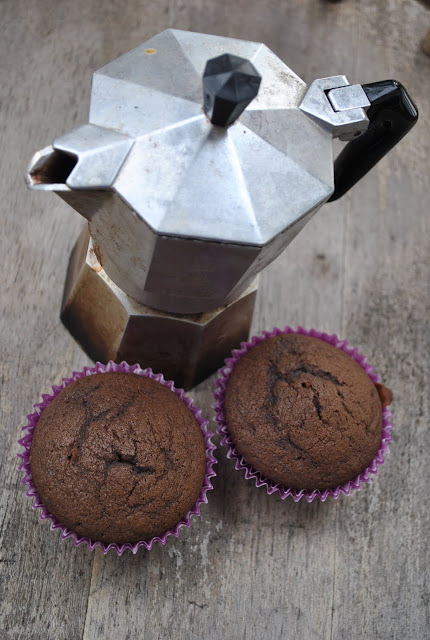
No better start than brewing some caffeine with my italian coffee maker and having a cup while I put some in the cake batter...


Chocolate-coffee cupcakes

Makes 12 cupcakes (fat topped ones)

1 1/3 cup flour
1/3 cup cocoa powder
1 teaspoon baking powder
1/2 teaspoon baking soda
1/4 teaspoon salt
1/2 cup milk
1/2 cup good strong coffee
1 stick of butter, softened
1 egg
1/2 cup white sugar
1/2 cup brown sugar

Preheat oven to 350 F
Cream the butter with the sugars. Mix in the egg. Add the coffee and milk. Don't panic, the mixture looks very liquid at this stage but it'll work just fine. In a bowl combine flour, cocoa powder, baking soda, baking powder and salt. Add the dry mixture to the liquid one slowly mixing with a spatula. Pour batter into baking cups and bake for about 15-20 min. Let them cool in a rack before frosting.


Mocha frosting

Makes enough for the 12 cupcakes (I had no leftovers)

1 stick of butter, softened
1/4 cup strong coffee
2 teaspoons instant coffee
3 cups confectioners sugar (I know, it's painful)

Cream together butter and coffees. Add sugar cup by cup until frosting has the desired consistency.

We enjoyed them along with the strawberry shortbread cake Laura's roommate brought... sugar coma!


Friday, April 9, 2010

Black forest cake


First of all. My apologies for the pictures. It was pouring water out when I made this cake and light was not exactly what you'd call abundant.

Now let's talk cake.

Spaniard (that'd be me): Aaron I'm gonna let you choose which cake I'm making for your birthday
Aaron: Oh! Cherry chip cake is my favorite! or at least it was like... 10 years ago.
Spaniard: Ok, well, I'll make you cherry chip cake then!

I type cherry chip cake on google. First thing I see. A VERY pink cake. See Aaron might be weird, but he's not a pink kind of guy. Well, keep searching.  First recipe I read says 'perfect cake for a princess!'. OK. Aaron's definitely not a princess. He probably liked this cake when he was 6, but he was turning... well, 30+. I decided I was gonna find a cherry cake for a grown up.

So... what about a black forest cake? Chocolate (yum), cherries (meh) , whipped cream (yay), some liquor (extra yay)... That's what I'm talking about. The traditional cake is made with cherries that have been soaked in Kirsch, a cherry liqueur. I searched the entire city for cherries in Kirsch, or plain Kirsch. No luck. So I went with Marraschino cherries and some almond liqueur. 


I halved the recipe, mostly because it was just 3 of us eating a cake meant to serve 10 people.


For the cake

2 1/8 cups all purpose flour
2 cups white sugar
3/4 cups unsweetened cocoa powder
2 teaspoons baking powder
3/4 teaspoons baking soda
3 eggs
1 cup milk
1/2 cup oil
1 teaspoon vanilla extract

Preheat oven to 350 F

In a bowl, combine flour, sugar, cocoa, baking powder, baking soda, and salt. Make sure the mixture is uniform and you don't have cocoa powder lumps. 
In another bowl mix eggs, milk, oil, and vanilla; beat until well blended. Add the dry ingredients slowly while mixing. Pour the batter into greased pans and bake for 35 min or until a toothpick comes out clean. Let the cake cool completely and then slice in half. 


For the filling

2 cans marraschino cherries
2 pints cream for whipping
4 tablespoons sugar
1/2 cup amaretto (almond) liqueur (or cherry if you find it)

To whip the cream, I'd recommend placing the bowl and wisk in the freezer for a while before starting. Then start whipping the cream, until soft peaks form. Add the sugar and the liqueur and keep beating until hard peaks form. Cut the cherries in half and mix them with about 3 cups of whipped cream. (Reserve the rest of the cream for frosting). Place the filling between layers. Once the layers are complete, frost the cake (as well as you can) with the remaining whipped cream. Decorate with chocolate shavings and cherries.

Chill for a couple hours before eating. I'm telling you, even if you're not a cherry fan, you're gonna lick your fingers with this!

Wednesday, April 7, 2010

Cranberry white chocolate oatmeal cookies


Do this guys sound familiar? yes, I know, I already updated an oatmeal cranberry cookie recipe. But this one has chocolate!

Last Friday it was my friend JM's bday. He lives in Atlanta so he got a package in the mail with one of my Spanish easter cakes and a box of these cookies. Not bad huh?

I wanted to try a new recipe for oatmeal-whatever cookies. Because you can really add whatever it is you want. Raisins? Apricot? Dark chocolate?. Your choice. Plus they have oatmeal. That makes them healthy, right? Right.


It didn't take me long to find a right combo of ingredients. This recipe comes from the 'Craisins' bag.

2/3 cup butter
2/3 cup brown sugar
2 large eggs
1 1/2 cups old fashioned oats
1 1/2 cups all purpose flour
1 teaspoon baking soda
2 cups dried cranberries
2/3 cup white chocolate chips

Preheat oven to 350 F.
Cream butter and sugar together until fluffly. Mix in the eggs one at a time. In a bowl, combine oats, flour and baking soda. Add to the wet mixture and mix well. Stir in the cranberries and chocolate chips and incorporate with a spatula. Drop by tablespoonfuls in an ungreased baking sheet. Press with a fork to flatten (they don't get flat during baking). Bake for 15 min or until lightly golden.


Wednesday, March 31, 2010

Coconut cream meringue pie


This is a weird pie. I'm telling you. Not that it tastes weird, but it has some funky ingredients in it. That said, it's a coconut lover's dream. And my friend Amanda is one of them.

A couple months ago I won a contest and received a bunch of coconut stuff at home. The pack included coconut cream and coconut oil so I figured using them would make the pie even more coconutty.


To make it extra extra special I used a chocolate pie crust. Looks good huh? On top of that, the actual pie filling plus a generous dusting with coconut flakes and of course, there's no pie without meringue on top. I love meringue. My mum loves meringue. It's a family thing you know.

Here are the ingredients and the possible substitutions.

For the chocolate crust
1 cup flour
1/4 cup cocoa powder
1 tablespoon sugar
1 teaspoon salt
1 sticks unsalted butter, very cold cubed
1/4 cup very cold water

For the filling
8 tablespoons coconut cream + 2 cups of water (substitute for 2 cups coconut milk)
3 egg yolks
2 tablespoons coconut oil (substitute for 2 tbsp butter)
1/4 cup cornstarch
(2/3 cup sugar, optional, I didn't add it)

For filling topping use 1 cup coconut flakes

For the meringue
3 egg whites
1/4 teaspoon cream of tartar
4 tablespoons sugar

To make the crust:
In a bowl, mix cocoa powder and flour until well combined. Add the cubed cold butter and mix with your hands, two knifes or a pastry cutter until pebbles form. Add the water and mix until smooth. Don't be lazy! Get your workout of the day!

Blind bake the crust at 350 F for 15 min.

To make the filling:
In a saucepan, combine sugar, cornstarch, coconut milk (cream + water) and coconut oil. Cook over medium heat until thickened. Second part of your workout: you're gonna have to whisk well to incorporate the cornstarch. If you get too tired you can always use a handmixer with a whisk attachment. Stir a small amount of the mix into the egg yolks and whisk well. This will bring the eggs to the mix temperature and prevent them from curdling. Add a little more mix, you can never be too cautious. Now add the eggs to the rest of the mix and cook for 2 minutes while whisking. Pour hot filling into the baked crust. Let it cool down for about 10 min and sprinkle with the coconut flakes. Set aside and let it come to room temperature.

To make the meringue and assemble the cake
Preheat oven to 400 F.
In a bowl, preferably cold, add the egg whites and start whipping. When soft peaks form, add the cream of tartar and the sugar. Keep beating until hard picks form. Drop by tablespoonfuls (or pipe with a bag) over filling. Bake for 12-15 minutes until the meringue is golden. Cool on a wire rack for an hour and then transfer to the fridge for at least 2 hrs before serving.

After the hard work, eat a big piece!


Sunday, March 28, 2010

International tarting goes Hebrew: Rugelach!


People, I introduce you to Rugelach. Or the pastry of heavenly taste. 

What are rugelach? They're a jewish pastry with a cream cheese and butter dough. The most traditional filling (as far as I'm concerned) is the prune one. But any fruity filling works well, so if you're not a big prune fan, choose your favorite jam and you're good to go...

As you readers might now... Me and Maria from Remena Nena have started this thing of ours called 'International Tarting'. The idea is to take recipes that have something challenging to them and try to make them in both sides of the Atlantic. And believe me, this dough, as good as it is, it´s not easy to roll...

But these beauties are worth it


The recipe is adapted from 'Every last cookie' and comes from the Martha Stewart cookie cookbook
I omitted any added sugar since the prunes are sweet themselves and just didn't have white bread around (I'm a wheat girl). The prunes are supposed to be soaked in liquor but again, no liquor around, water works just fine. 

Oh I almost forgot! I made some chocolate ones as well!


For the dough:
2 sticks of butter
8 ounces cream cheese at room temperature
2 cups all purpose flour

For the prune filling:
1 cup prunes
1/2 cup water

For the chocolate filling:
3 ounces bittersweet chocolate, chopped

To sprinkle, cinnamon

To make the dough:
Cut the butter (cold) into cubes. In a bowl, mix the butter with the cream cheese. I started with my hands, realized it was not gonna happen and switched to 2 knifes. Add the flour. Here it gets complicated... the recipe calls for not overworking the dough but I found it pretty much impossible to blend everything together without putting a huge amount of effort into it. Just do it as well as you can and make sure all the flour is incorporated. The dough will be VERY sticky. Divide it in half and prepare to flour your rolling pin  and counter thoroughly. Roll each half of the dough into a disk. Cover with plastic wrap and refrigerate for at least an hour. I refrigerated overnight.

Prepare the prune filling:
Do ahead. Place the prunes and water (or brandy) in a container and let it soak overnight. Take the prunes out of the liquid and puree. I didn't quite do the math right here since I made filling for an entire recipe but only filled half the rugelach with prune. Well, that meant double the filling and I certainly won't complain about the result. 

To make the rugelach

Preheat your oven to 325 F

Spread the prune filling on one of the dough disks, sprinkle with cinnamon. Leave a 3/4 inch border (aprox.) on the outer side. With a pizza cutter, cut the dough into 16 pieces. I tried to see if cutting it into 8 would make too big rugelach and it does. They are harder to roll and don't look as pretty. You can always eat them in pairs. Now roll the dough from the outside to the inside. The wet prune filling makes it a little messy but don't worry, once in the oven it doesn't spread everywhere. Sprinkle the surface with cinnamon.
For the chocolate ones, repeat the process covering the disk with chocolate chunks. 

(Now you can refrigerate them for an hour, I couldn't find enough patience to do so.)

Bake for 40-50 min. When the rugelach are done, the outside will be crisp and golden. Let cool completely before eating (if you can). Enjoy, I know you will.


Friday, March 26, 2010

The BEST chocolate chip cookies (so far)


Last Saturday I woke up and just had to make cookie dough. I just had to. Even though we were going for breakfast to an adorable place with an amazing spinach, mushroom, gorgonzola omelette...

It all started with these cuties...


Aren't they the most adorable measuring cups ever? Yes, they are old, that's why...

Folloing the advice from The New York Times, that recommends refrigerating the dough for at least 24 hours... I stuck in the freezer until the day after...

Oh yeah, you might want the recipe! I borrowed it from Smitten Kitchen

2 cups all-purpose flour
1/2 teaspoon baking soda
1/2 teaspoon salt
3/4 cup unsalted butter, melted
1 cup packed brown sugar
1/2 cup white sugar
1 tablespoon vanilla extract
1 egg
1 egg yolk
2 cups chocolate chips (I used big bittersweet ones)

Preheat the oven to 325 F whenever you're ready to bake. Either right away or after refrigerating, which I strongly strongly recommend.

Melt the butter and cream the sugars in it. Add the egg and egg yolk, beat well and add the vanilla extract. In a bowl mix the dry ingredients and then stir them in the butter mix. Stir in the chocolate chips mixing them with a spoon/spatula.

Now cover the dough with plastic wrap and refrigerate for 24 hrs. Or not.

Bake for 15 minutes (yes they actually take that long to be done, remember is a 325 oven, not a 350).

And then bite...


And enjoy that melted chocolate, that crisp but chewy mix of flour and butter... Enjoy them with coffee or milk or plain...

See I couldn´t resist taking a bite while taking pictures...

Sunday, March 21, 2010

Marbled banana bread


First of all, I hope you like the new design for the blog... I can't wait to hear your feedback!

Sunday afternoon... what better than a bit of banana bread and a cup of coffee to wrap it up? And what about we add chocolate to that banana bread? Yum!

As usual, ripe bananas are the trick to amazing flavor...

3 ripe bananas mashed
1 3/4 cups flour
1/4 cup butter
1/2 cup brown sugar
1 plain yogurt
2 eggs
1 teaspoon vanilla extract
3 tablespoons chocolate chips
2 tablespoons cocoa powder


Preheat oven to 350 F

Cream together butter and sugar. Stir in the yogurt. Beat in the eggs one at a time. Mix in the vanilla, bananas and chocolate chips. Do not add the cocoa powder yet! Add the flour, baking powder and baking soda. Now divide the batter in half (approximately). To half of the batter, add the cocoa powder. Mix well but try not to overmix. On a loaf pan, alternatively add the cocoa powder and the plain batter by tablespoonfuls. Swirl with a knife to create the marble effect. As you see mine was not quite marbled at the beginning of the loaf but it sure was as you got to the middle of it. Bake for about 60 min or until a toothpick comes out clean.

This bread comes out moist and soft and bitting into the chocolate chips with the flavor of the banana still in your mouth... hmm! Enjoy!

Wednesday, March 17, 2010

Candied citrus 101

Can I tease you just a little bit? check this out


Yum huh?

Well how to get from raw orange to candied to dipped in chocolate is actually quite easy...

Step 1. Cut the oranges in slices about half inch thick (pretty obvious right?)


Step 2. Put the oranges in a pot and cover them with water. Cover the pot and turn the heat on. Bring the oranges to a boil and turn the heat off. Dump the water and change for new water, repeat the process 4 times total.

Do not put the oranges in boiling water, always start with cold water, bring to a boil then turn the heat off. Yes? cool!

Step 3. Make a syrup. Now there's a lot of proportions out there. The idea though is that you get to the saturation point of sugar in water, that is, when water cannot disolve any more sugar. About 2 cups of sugar for every cup of water. Bring the mixture to a boil and add the oranges. Simmer for about 45 minutes, until the oranges become translucent. There's no overcooking here so don't freak out. Just make sure the heat is in low, you don't want the sugar to turn into caramel or burn.


Now your oranges are candied, you just need to let them dry out. You can first place them on a plate so they let go of the extra syrup. After a couple of hours, when they are not extra sticky, coat them with a bit of sugar, the same way you would bread meat. Now you can place them on a rack and let them dry overnight.

If you're wondering what do you do with the syrup now... well, you can reuse it for several batches... but even better! Think about it, what's the syrup? water, sugar + delicious orange flavor! My recommendation, use it to glaze pound cakes or even better, make wholes in the pound cake and pour the syrup over so that it moistens the entire cake.

Step 4. Melt a cup of chocolate chips, chocolate chunks or bark over a double boiler or in the microwave. Dip your oranges and... voila!


Thursday, March 11, 2010

Flying strawberry chocolate chip coffee cake

Last weekend I had the pleasure to visit my friends Amanda, Ben and Orion in Cape Cod. There's no visiting any friends with empty hands, so I brought chocolate muffins and this coffee cake.

Funny, or not so funny story... we left the house for a bit and Ben's sweet little dog, Lucy, ate two of the muffins. Don't ask me how, but she managed to take them out of the plastic wrap. As freaked out as we were, nothing super bad happened.


Well, now let me get you a bit jealous. As Amanda says, Ben is one of those people that comes with perks. His perk is he flies planes. As of now, little ones, but beware Boeing! here comes Ben...
So guess what, we got to fly over the cape and adore the beauty of the landscape...


The coffee cake was our after flight treat and it was not overly sweet, moist, tender and rich. Semi-melted chocolate chips and delicious baked strawberry... Yum!

To make it...

1/2 stick of butter
1 cup all purpose flour
1/2 cup brown sugar
1 egg
1 fat free yogurt (or half a cup of sour cream)
1 tsp vanilla
1 tsp baking powder
3 ounces chocolate chips
1 cup of  fresh strawberries

Note! I baked a small coffee cake, the size of a squared 6 x 6 in pan. Feel free to double the recipe if you want to make a bigger or thicker cake.


Preheat your oven to 350 F.

In a bowl cream together the butter and sugar. Add the egg and mix well. Mix in the yogurt and the vanilla extract. Beat in the flour and baking powder just until incorporated.
Clean the strawberries and slice them (about 4 slices for each strawberry). Pour half of the coffee cake batter in your greased baking pan. Place the strawberry slices on top of the batter. Cover with the rest of the batter. Sprinkle the chocolate chips on top, pressing them down a little bit so they get well attached.

Bake for about 30 min or until a toothpick comes out clean. Let it cool and cut into squares.

Thursday, March 4, 2010

Chocolate cheesecake

Yesterday we celebrated my roomie's birthday with a nice dinner at home and I obviously offered to make a birthday cake...

I really wanted to try making a chocolate cheesecake and let me tell you it's easy and yummy! Only remember! you have to make it one day in advance so that it cools properly!


The recipe comes inspired from Emeril's New York Style Chocolate Cheesecake. I'm not sure if it's an adaptation because I changed a few things but the idea is there and my recipe is as follows.

For the crust:


1 1/2 cups graham cracker crumbs
4 Tablespoons butter
1 Tablespoon cocoa powder

To assemble the crust break the graham crackers into crumbs. I put them in a ziploc bag and crushed them using a rolling pin (mess free!). To the crumbs add the tablespoon of cocoa powder and mix well. In a bowl melt the butter and stir in the mix. Generously butter your springform pan and add the crumbs to the bottom. Press them down to form the crust (measuring cup works great for this). Set aside.


For the cheesecake:

2 1/2 (8-ounce) packages cream cheese
1 1/2 teaspoons vanilla extract
3 tablespoons all-purpose flour
3 eggs
1 plain non-fat yogurt*
8 ounces melted bittersweet (you can use semisweet) chocolate
1 cup granulated sugar

*The recipe calls for sour cream but I didn´t have any and the yogurt substitution worked pretty well. 

Preheat oven to 350 F
In the microwave, or in a double boiler, melt the chocolate and set aside to cool.
In a bowl, mix together the cheese and sugar until creamy (be sure to have the cheese at room temperature before you start). Mix in the vanilla extract and the eggs one at a time. Add the melted chocolate and then the yogurt. (The recipe called for the flour first but I didn't read correctly and I added it at the end. It worked just fine). Stir in the flour and mix until combined.  Carefully pour the batter in the springform pan.
Bake for 1 hr until set. Let cool in the oven for about 1 hr. This is supposed to prevent cracking. Mine cracked anyway. Transfer to the fridge and cool overnight.

For the garnish

Prepare a ganache adding 1/2 cup of boiling heavy cream to 1 cup of chocolate (whatever kind rocks your socks) and mixing until the chocolate dissolves. Cool slightly and then pour on top of the cheesecake. Works wonderful to cover any cracks.  Cool in the fridge. If desired, decorate with fresh strawberries.


Tuesday, March 2, 2010

The myths of chocolate

Let's begin this post with a number. If you go to Pubmed (a very well known journal database for medical-related publications) and type in 'chocolate', the searcher gives back more than 3000 results. Interesting huh?


The debate about the effects of chocolate in the human body, including aphrodisiac properties, is a neverending story with all sorts of opinions.

'The Aztecs may have been the first on record to draw a link between the cocoa bean and sexual desire: the emperor Montezuma was said to consume the bean in copious amounts to fuel his romantic trysts.'  said the NY Times 

Now is it only myth or is there real chemistry behind this thoughts?
The fact: chocolate contains both tryptophan and phenylethylamine. Tryptophan is a building block (precursor) for serotonin, which is a neurotransmitter with a direct function in the control of moods and behaviors. Phenylethylamine, very similar to amphetamine, triggers the release of dopamine and norepinephrine which are also stimulants (the lack of them is cause of depression).

At this point I'm sure most of you are thinking that eating a chunk of chocolate is pretty much like overdosing in LSD. Far from real. Phenylethylamine is metabolized by enzymes fast enough so that the amount of that reaches the brain is ridiculously small, contributing no perceptible psychoactive effect. While tryptophan is still there, the amount contained in chocolate is so small that you would have to eat about 40 pounds of chocolate to notice any physical effects.

The truth is, chocolate's aphrodisiac properties have more of a psychological component than a chemical one... then why do we crave it?

'Theobromine – a weak stimulant found in chocolate – in concert with other chemicals such as caffeine, may be responsible for the characteristic ‘buzz’ experienced when eating chocolate. Scientists at the Neurosciences Institute in San Diego suggest that chocolate contains pharmacologically active substances that produce a cannabis-like effect on the brain, such as anandamide: a cannabinoid neurotransmitter (...) elevated levels of the neurotransmitter can intensify the sensory properties of chocolate (texture and smell), thought to be essential in inducing cravings.' (source: science in school)

Facts or not, chemistry or psychology, I love, enjoy and crave dark chocolate... the occasional chocolate square is usually enough, but sometimes I'm in the mood for overdose... and believe me, this recipe does the trick...


Gooey, warm, soft, melted chocolate hidden in a delicate cake shell... could you ask for more? well, maybe sharing it ;)


Lava cakes (also known as coulant)

4.5 ounces bitterweet (or semi-sweet) chocolate cut into chunks
1 stick butter
2 large eggs
2 large egg yolks
1/4 cup granulated sugar
2 Tablespoons of flour

Note: I just made two of them in two 7 ounce ramekins, feel free to double the recipe

Preheat oven to 400 F
Butter the ramekins to use (liberally). In the microwave (or in a double boiler) melt together the butter and the chocolate. To avoid burning it heat it in intervals of 30 sec, then stir well and heat for another 30 seconds until the mixture is smooth and shiny. Let it cool.

In a separate bowl beat together eggs and egg yolks until frothy. Add the sugar and keep beating. The volume should increase. (It's supposed to double but mine never did). To the egg mixture add the cooled chocolate and butter and carefully mix with a spatula. Add the flour and stir until just incorporated. Divide the batter among the ramekins and place those in a cookie sheet. Bake for 11 to 14 min depending on the size of the ramekin. Check at the 11 minute mark. The cakes are ready when the sides look baked (like in the picture) and the center gooey. (Sorry that I didn't get to take a picture of it right out of the oven but there was a thin crust where the hole is).

If you can, wait until they cool down a bit. If not, devour it right out of the oven!


Now a question... science or not, does chocolate put you in the mood?

Oh if I left you wanting more cocoa loaded desserts... chocolate cheesecake recipe coming soon!