Showing posts with label cookies. Show all posts

Thursday, August 2, 2012

Fig newtons (and giveaway)


I'm not quite sure what to tell you about today. I'll tell you that summer is going by too fast but somehow it barely feels like summer. Oregon has rewarded us with a week of warmth, only to have rain and gray days to follow.

On days when it's 65 degrees (yes, you heard right) and miserable outside, it seems like everyone's pace is much slower than usual and few of us feel motivated enough to smile. On those days, I'm glad I can get in the kitchen and bake something. The oven keeps the apartment nice and warm in the evening, as if it really were hot outside.

These cookies were, surprisingly, a breeze to make. The dough needs to rest overnight in the fridge, but it takes about 10 min to put together and it's the easiest dough you've ever rolled. This said by someone who really hates rolling dough. The filling is even simpler. Dried figs, a bit of water, period.

Yes, I know what you're thinking. Why would I make these at home when I can buy a box of Fig Newtons at the grocery store for a couple bucks?. Well, just like with Thin Mint cookies, the homemade version is better. Far better. The cookie is softer and more buttery and the filling is just plain clean fig taste. They really are worth the little effort they involve.


Before the recipe, I'd like to announce a giveaway from Food on The Table. For those of you who aren't familiar with it, Food on The Table is a web and mobile service that creates meal plans and generates grocery lists according to your tastes/needs. After indicating food preferences/dietary restrictions, you'll be able to choose from a variety of recipes and Food on the Table will automatically build a grocery list for you. Moreover, their service will tell you which grocery stores on your area have sales on those items in your list. 

Sound good? Well then, to enter the giveway, all you have to do is leave a comment telling me which store sold cookie/candy/cake, you like making home versions of. For extra entries, follow Baking Powders on Facebook , or post about this giveaway on Twitter. Please leave a separate comment for the extra entries and indicate your FB/twitter name. You can enter until Thursday August 9th at midnight. The winner will be chosen and published on Friday August 10th. Good luck!

AND THE WINNER IS... ANDREAMC!

Fig Newtons
Adapted from Faux Martha

2/3 cup all purpose flour (more if needed)
6 tbsp softened unsalted butter
1/4 cup sugar
1/2 tsp baking soda
2 egg yolks
1 tsp vanilla extract

For the filling:
1 cup dried Black Mission figs
1/4 cup water

For the dough
With a stand mixer or hand mixer, cream the butter and sugar until fluffy. Add the two egg yolks and vanilla and beat to combine. In a bowl, sift together the flour and baking soda. Incorporate the flour mixture into the wet mixture, mixing with a spatula. At this point, depending on how warm your butter is, the dough might be really soft and very sticky. If this happens, you can add a bit more flour until the dough is soft and elastic but doesn't stick to the sides of the bowl. On the contrary, if the dough doesn't come together, you can add a tablespoon of water at a time and mix it in until the dough comes together. At this point, cover your dough with plastic wrap and let it rest in the fridge overnight. 

For the filling
In a food processor, combine the figs and water and process until you get a paste. If your figs are very dry you might need a bit more water. I didn't have any booze around, but I'm sure some bourbon or rum would go perfectly well with those figs. 

Preheat the oven at 350 F. 

Once the dough has rested, roll it to about 1/4 inch thickness and cut it into 3 1/4 inch strips. I'm not to concerned about perfect shapes, so I made a couple of them a bit wider. The only trick here is to work quickly. Since it's a soft dough, the more time you spend rolling it, the stickier it will get. I rolled mine between two pieces of parchment paper to make my life easier and then left the dough in the fridge for 5 min before adding the filling.

Spread the filling in the center third of your dough strips. Fold the sides of the dough over the filling and place them upside down on a cookie sheet (so the seam is facing the sheet). Cut the dough to form your cookies, as long or as short as you want them. Bake the cookies for 10-12 min or until golden brown. Once cold, store them in an airtight container. Mine didn't last at all, but I think you don't want to keep them for more than 4 days anyone as the dough softens up overtime. 

Wednesday, February 2, 2011

Homemade thin mints and my students


I'm gonna repeat myself. Just because I know I've already mumbled about teaching and students and such things. Well, you know, when you're a PhD student, life is quite limited to labs, classes, teaching and a little bit of fun social life.

Truth is, teaching is a big part of what I want my future to look like. Professor Bon? hopefully!. In the meantime, I devote my Monday and Wednesday nights to teaching general chemistry. It's certainly an interesting experience. You know those shows about colleges (like Community), in which there's a character who is the stereotypical student of some kind? I have them all.

There's the ones who are in college just because mum and dad wanted them to be, there's the mom with two kids who goes to school full time while she works full time, there's the already PhD who is back in school because he wants to go to med school. Prom queen, army guy, funny guy, dorky boys. I've had them all. And they are all great in their own way. 


Teaching is probably the most rewarding experience one could have. It's also one of the toughest ones. When T.A evaluations come, you see nasty comments (probably from that one student who yelled at you in class and called you an idiot), that make you feel terrible.  Just until you read the good ones. Those make it all worth it. The long hours of grading, the class preparation, the late nights teaching when you've been at work for over 12 hrs. It all pays off.

Today I was having a terrible day. One of those in which everything seems terrible. Then a few of my students tried to make me laugh. They tried really hard, goofing around and cracking jokes. And by the end of lab, I was in the best mood I've been in, all week.

Teaching is as good as these cookies. The home made version of the infamous girl scouts cookie, but cheaper, healthier and tastier. My friend Chase loves them to death. Since we pounded an entire box while playing cribbage a few days ago, I decided to make him a batch. He loved them and so will you.

Homemade thin mints

For the cookies
8 ounces/1 stick of butter
1 cup of powdered sugar
1 teaspoon of vanilla extract
1 cup of cocoa powder
3/4 teaspoon of fine grain salt
1 1/2 cups of all-purpose flour

For the chocolate coating
12 ounces of chocolate chips
Peppermint extract


Cream the butter, vanilla extract, salt and powdered sugar. Add the cocoa powder and mix well. Finally stir in the flour and mix until just combined. Don't overmix or your cookies will be hard. Place the dough in the freezer for about 30 min. Then roll it between two pieces of parchment paper, to about 1/8 in thickness. This dough is soft. My kitchen was hot and it kept getting too soft to cut and place in the baking sheet without it getting weirdly shaped. To prevent that, I rolled the dough and put it in the freezer for about 2 min before cutting shapes with the cookie cutter. That way they kept shape and were easier to handle. Also, you want to roll a bit of dough at a time, or again, it'll get soft and it'll be hard to handle. 
Bake the cookies at 350 for about 10 minutes or until you can smell them. They burn fast, so be careful.

Once the cookies are baked, let them cool completely so they harden, otherwise they'll break when you try to coat them (10 min in the freezer will shorten the cooling time). Melt the chocolate in a double boiler and then add the peppermint extract to your taste. You don't want to add it before since heat could alter the flavor (this doesn't happen with oils, only extracts) . I'm a big fan of microwaving chocolate, but you want to keep it warm while you coat the cookies and a double boiler works best for that. Dip the cookies one at a time. I still have to perfect the coating technique. I threw them in the chocolate, coated both sides and then using two forks, removed the excess chocolate (specially the one that sticks at the bottom). It's a matter of practice, my first cookies were extremely coated. Place the coated cookies in a piece of parchment paper and let them cool so the chocolate hardens. Once again, the freezer does the trick in a few minutes. Store in the fridge to prevent the chocolate from melting.
Saturday, December 18, 2010

Christmas decorated sugar cookies and travels


Hola everyone! I'm writing from home! Yes, I'm back in Spain for the holidays, and I haven't stopped  baking ever since I landed. Well, let's be honest, I haven't stopped eating either. Food's too good around here. My mum loves feeding me. She's obviously convinced that I look too skinny, even if I've put a few pounds ever since she last saw me.

Even better, my entire family is now highly motivated with the whole baking business. Something unheard of. We've always been a family of cooks, but there used to be no bakers. I was the 'pioneer' and I've gotten all of them into it, which makes me insanely happy. In the last three days, I've taught my mum how to make bread, my sister how to make and decorate sugar cookies and I've had my dad help me out taking food pictures.


This cookies are my sisters' present to her friends. A couple weeks ago she sent me a link to a bakery here in Barcelona that makes decorated sugar cookies. They make nice stuff, pretty and also extremely expensive. 4$ a cookie, 40$ for a box of 4 Christmas themed ones. Apparently she's been buying them for a couple years for the holidays. I find it quite insane. I convinced her we could make a batch of 30 cookies for way less than 10$. And yesterday, there we were, hands on dough. 

We had lots of fun with this project. I did the icing piping, she made the tree trunks with melted chocolate. And my future nephew, who is currently in my sisters' belly, was really happy with it. He started moving and kicking as soon as the cookies in the oven started impregnating the kitchen with a wonderful smell. The typical American Christmas cookies are the gingerbread ones, but here in Spain, people are not quite used to that flavor. I think sugar cookies make for a great alternative or even a nice addition to the gingerbread ones. And I certainly think you should make these!


Sugar cookies:
Recipe adapted from Daring Bakers

200g / ½ cup + 6 Tbsp Unsalted Butter, at room temperature
400g / 3 cups + 3 Tbsp All Purpose flour
200g / 7oz / 1 cup  Sugar
1 Large Egg, lightly beaten

Preheat your oven to 350 F/180 C

Cut the butter in chunks and add the sugar. With your hands or a beater, combine until the sugar is completely incorporated in the butter. Add the beaten egg and mix until combined. Add the flour and mix with a spoon until you get a homogeneous hard dough. Refrigerate the dough for about 1 hr.
With a rolling pin, roll the dough to a thickness of about 1/2 cm or 1/5 of an inch. Cut the shapes with floured cookie cutters and place in a baking pan covered with parchment paper. Bake for 10-12 minutes, until the bottom of the cookies is golden brown. Don't overbake them or they'll become hard. Let the cookies cool before icing.


Royal Icing:
Recipe adapted from Daring Bakers
(makes enough to decorate 30 cookies the way we made them, if you're planning on flooding them, I'd suggest you double the recipe)

150g – 175g / 1 1/4 - 1 1/2 cups Powdered Sugar
1 Egg White
5ml / 1 tsp Lemon Juice

Combine the ingredients in a bowl and beat them by hand or with an electric mixer for about 10 minutes or until you achieve the desired consistency. Flooding icing should be thinner and runny. We were just 'painting' with the icing so we added a little bit more powdered sugar to make it thicker.
Mix the icing with food coloring as desired. Pipe on the cookies and let it dry overnight.


Enjoy!


Tuesday, September 21, 2010

Growing up, 'rosquilletas' and birthday cake


Yesterday I turned 25. Quarter of a century, big number, a little scary, a little wonderful. For many reasons this birthday has made me reflect a lot about past, present and future. About growing up and life choices. I guess with age, comes wisdom, even if it's not a lot of it. 
I guess all of us reach a point in our lives in which priorities change drastically. We look back and laugh at what years ago seemed so important. Having that new pair of shoes, buying a new purse, being cool or popular at school seem such silly things right now. Somehow, we all grow up, or at least most of us, to realize that life priorities usually involve people, ourselves and our career. 

By people I mean family and friends and sometimes couples. Living abroad I've realized how important it is to keep people you love close, in one way or another. The internet and its technologies make it easier to keep in touch with those who live far, but it still requires an effort. In my case, it's an effort totally worth making. Meeting new people and making new friends is always on top of the list as well. The truth is, when you live 6000 miles away from your family, friends take that place.


Once more, a few years ago, I would've complained about how sometimes my mum didn't understand anything or how my dad was grumpy and annoying or how I fought with my sisters about silly stuff. Today I'm proud and happy of having all of them in my life. I appreciate all the effort my parents have put in my education and all the nights my sisters didn't go out just to babysit me. At 25 I realize that they're probably the most important thing in my life and I wouldn't be where I am without them.

And finally myself. Growing up involves accepting who you are and understanding that there's not such a thing as being perfect. Might sound too typical, but it ends up being true. Dealing with your flaws, using your virtues, accepting that you might not be the smartest kid or the most good looking are sort of the painful part of getting old. Painful until you realize that there's people who love you for who you are and that those people make your life so amazing that the rest doesn't really matter anymore. 


So here it is, my growing up. And these delicious cookies I haven't talked about yet. They're the typical bread-cookie from my dad's town. I've eaten this cookies ever since I can remember and it seemed about time to try to make them myself. They're crunchy and tasty, perfect for dipping in coffee, even though they're not sweet. You can give them whatever shape you want, sticks, pretzels or round, they're all gonna taste amazing. The recipe makes a ton of them and they keep very well in an airtight container for several days, so you have no excuse! gotta try them!

'Rosquilletas' 

3 1/2 cups all purpose flour
2 teaspoons of yeast
1 1/2 teaspoons of salt
2 teaspoons anise seeds (you can omit them if you want but the cookies definitely don't taste like anise)
1/2 cup olive oil
1/2 cup water
1 egg
1/2 cup sesame seeds

Mix the flour, yeast, salt, sugar and anise seeds in a mixing bowl. Stir until combined. Add the milk, the olive oil and the water. Knead the dough for 5 minutes until it's soft and elastic. Let it rest for about 2 hrs or until doubled in size.

Divide the dough in 20-30 balls, depending on how big you'd like the cookies to be. I made 25 balls. Let them rise again until doubled in size. Preheat the oven to 375 F. Roll the balls into ropes and form a ring. Brush the top of the cookies with egg and dip them in sesame seeds. 

Bake for about 30 minutes or until the tops are golden and the cookies are crunchy. Don't overbake or else they'll be hard. 
Oh, I mentioned it was my birthday. I made myself a cake for the party we had on Saturday. I couldn't take many pictures of because it was made late in the afternoon and it was pouring water outside. So just one pic of the result. The cake was a 3 layer white cake, recipe here, filled with a mix of whipped cream  and cocoa powder, sliced bananas and shredded coconut. The frosting is whipped cream and cocoa as well and the top is a simple chocolate ganache.


Tuesday, August 3, 2010

Chocolate chip hazelnut cookies and summer reads


Hello pretty people! Yes yes, another cookie recipe. I'm sorry, but seriously, these are WAY too good to miss. You're gonna want to eat them. All. With a glass of milk or without it. They taste like nutella, sort of. Maybe you'll eat them while reading a book?

I devour books in summer. I start by going through a book while I'm on my long plane flights on my way home. (Specially if annoying teenagers don't let me sleep). Then I just carry a book around everywhere I go. The beach, the park, the car (not if I'm driving that is). I read while I'm having breakfast, while I wait for my bread to rise, while my parents are taking naps. I just read read read.


This summer I'm going for the classics. Believe it or not, I have never read 'to kill a mockingbird' or 'the catcher in the rye', so I decided to give them a shot. Have you read them? did you like them?. I seem to be in the dark/mystery mood lately. My other two reads for vacation are 'Invisible' by Paul Auster and 'the beekeeper's apprentice by Laurie King. Too much information? Sorry, I love books!. Now you tell me, what are you reading this summer? Do you have any recommendations for me?

I think you should eat these cookies while you read. They are THAT good. My roommate claims they are the best cookies he's ever eaten. They have oats and chocolate chips and crunchy hazelnuts. They smell like heaven. You could add other nuts to them, but the hazelnuts and chocolate combination has a nutella effect to it that you can't beat. Plus they are made with whole wheat flour, which means they are healthy, right? right!


Hazelnut chocolate chip cookies
adapted from 101 cookbooks


5 ounces bittersweet chocolate chips/chunks
1 cup whole wheat flour
1/2 teaspoon baking powder
1/2 teaspoon baking soda
1/2 teaspoon salt
1 cup old fashioned oats
3/4 cups hazelnuts chopped by hand
1/2 cup butter, softened
1 egg
1/2 cup brown sugar

Preheat your oven to 350 F.

In a bowl, mix together flour, salt, baking powder and baking soda. Set aside. In another bowl cream together butter and sugar. Mix in the egg. Add the dry mixture and mix until combined. Stir in oats, chocolate chips and hazelnuts and incorporate into the dough with a wooden spoon. Drop the dough into a baking sheet by tablespoonfuls and press it down to flatten (they don't expand much when baked). Bake for 7-10 minutes until the cookies are fragrant and have golden edges.

Friday, July 30, 2010

Swedish rye cookies and vacation


I bet you know what I mean when I talk about being completely exhausted. About reaching that point in which you just keep on going because of pure inertia. When you just wake up because the alarm goes off and drag yourself to work with a sleepy face. When even if on the weekends you get to relax a bit, you're in constant motion, not a minute left for breathing. I certainly have reached that point.

It's been a year since I last was home, since my real last vacation. So right now, I really need to go home. Don't get me wrong. I just passed my second aniversary in the US and every day that goes by, I'm happier with the decision of moving here. Living 6000 miles away from your family is not easy, but for me it's totally worth it.


One of the reasons is that after two years of working like crazy both at MIT and at my current company, I will finally be a grad student. A PhD student nonetheless. I know it might sound boring to you, but I'm crazy excited. What can I say, I was born for research. And the teaching part, has me thrilled. I can't wait to have a bunch of students to guide through labs and classes.

But before that, I really need to charge batteries. That means being in Barcelona with my family and friends. Beers in the hot afternoons and delicious food. Then going with my parents to my dad's hometown. The smallest town in earth, or almost. I can picture myself waking up in the morning and baking some brioche for breakfast. Then going with my dad to the fields, to pick fresh fruit from those trees that have been in the family for generations. Maybe put some of that fruit in a galette or a tart. Certainly, hanging out with my friends until the moon goes down and the sun comes up. In a word, relaxing.


Don't worry, I'll be baking and posting!. Cleaning my pantry from flours and other ingredients has left me with a ton of baked goods that my coworkers and friends have been happy to receive. These Swedish rye cookies had been in my bookmarks for a long time and the only thing I'm sorry about is that I didn't make them earlier. They are tiny nice light cookies. Not overly sweet. In fact, if it weren't for the powdered sugar, they would barely be sweet at all. Perfect pairing for a cup of tea, they make a great afternoon snack. Plus the recipe makes a huge amount of them so you'll be able to share!


Swedish Rye Cookies
Adapted from 101 Cookbooks
Print this recipe

Note: I adapted the recipe by changing cane sugar for brown and skipped sprinkling the cookies with large grain sugar before baking. I used a small flower cookie cutter, less than 1 inch diameter and got 3 dozen cookies.

1 cup rye flour
1 cup whole wheat pastry flour
1/2 teaspoon salt
1/2 cup cream cheese
1/2 cup unsalted butter
1/2 cup brown sugar

In a bowl, combine flours and salt. With a hand mixer, cream together the butter and cream cheese. Add the sugar and beat until fluffy. Add the flour mixture and mix with a wooden spoon until combined. Refrigerate the dough covered in plastic wrap for about 30 min (you can skip this but it made it easier for me to work the dough in a really hot kitchen).

Preheat your oven to 350 F. Roll the dough to a 1/4 inch thickness and cut in shapes with a cookie cutter. Bake the cookies for about 7 minutes or until golden on the edges. Don't overbake or they'll become dry. Let them cool and dust with powdered sugar.

Wednesday, April 7, 2010

Cranberry white chocolate oatmeal cookies


Do this guys sound familiar? yes, I know, I already updated an oatmeal cranberry cookie recipe. But this one has chocolate!

Last Friday it was my friend JM's bday. He lives in Atlanta so he got a package in the mail with one of my Spanish easter cakes and a box of these cookies. Not bad huh?

I wanted to try a new recipe for oatmeal-whatever cookies. Because you can really add whatever it is you want. Raisins? Apricot? Dark chocolate?. Your choice. Plus they have oatmeal. That makes them healthy, right? Right.


It didn't take me long to find a right combo of ingredients. This recipe comes from the 'Craisins' bag.

2/3 cup butter
2/3 cup brown sugar
2 large eggs
1 1/2 cups old fashioned oats
1 1/2 cups all purpose flour
1 teaspoon baking soda
2 cups dried cranberries
2/3 cup white chocolate chips

Preheat oven to 350 F.
Cream butter and sugar together until fluffly. Mix in the eggs one at a time. In a bowl, combine oats, flour and baking soda. Add to the wet mixture and mix well. Stir in the cranberries and chocolate chips and incorporate with a spatula. Drop by tablespoonfuls in an ungreased baking sheet. Press with a fork to flatten (they don't get flat during baking). Bake for 15 min or until lightly golden.


Sunday, March 28, 2010

International tarting goes Hebrew: Rugelach!


People, I introduce you to Rugelach. Or the pastry of heavenly taste. 

What are rugelach? They're a jewish pastry with a cream cheese and butter dough. The most traditional filling (as far as I'm concerned) is the prune one. But any fruity filling works well, so if you're not a big prune fan, choose your favorite jam and you're good to go...

As you readers might now... Me and Maria from Remena Nena have started this thing of ours called 'International Tarting'. The idea is to take recipes that have something challenging to them and try to make them in both sides of the Atlantic. And believe me, this dough, as good as it is, it´s not easy to roll...

But these beauties are worth it


The recipe is adapted from 'Every last cookie' and comes from the Martha Stewart cookie cookbook
I omitted any added sugar since the prunes are sweet themselves and just didn't have white bread around (I'm a wheat girl). The prunes are supposed to be soaked in liquor but again, no liquor around, water works just fine. 

Oh I almost forgot! I made some chocolate ones as well!


For the dough:
2 sticks of butter
8 ounces cream cheese at room temperature
2 cups all purpose flour

For the prune filling:
1 cup prunes
1/2 cup water

For the chocolate filling:
3 ounces bittersweet chocolate, chopped

To sprinkle, cinnamon

To make the dough:
Cut the butter (cold) into cubes. In a bowl, mix the butter with the cream cheese. I started with my hands, realized it was not gonna happen and switched to 2 knifes. Add the flour. Here it gets complicated... the recipe calls for not overworking the dough but I found it pretty much impossible to blend everything together without putting a huge amount of effort into it. Just do it as well as you can and make sure all the flour is incorporated. The dough will be VERY sticky. Divide it in half and prepare to flour your rolling pin  and counter thoroughly. Roll each half of the dough into a disk. Cover with plastic wrap and refrigerate for at least an hour. I refrigerated overnight.

Prepare the prune filling:
Do ahead. Place the prunes and water (or brandy) in a container and let it soak overnight. Take the prunes out of the liquid and puree. I didn't quite do the math right here since I made filling for an entire recipe but only filled half the rugelach with prune. Well, that meant double the filling and I certainly won't complain about the result. 

To make the rugelach

Preheat your oven to 325 F

Spread the prune filling on one of the dough disks, sprinkle with cinnamon. Leave a 3/4 inch border (aprox.) on the outer side. With a pizza cutter, cut the dough into 16 pieces. I tried to see if cutting it into 8 would make too big rugelach and it does. They are harder to roll and don't look as pretty. You can always eat them in pairs. Now roll the dough from the outside to the inside. The wet prune filling makes it a little messy but don't worry, once in the oven it doesn't spread everywhere. Sprinkle the surface with cinnamon.
For the chocolate ones, repeat the process covering the disk with chocolate chunks. 

(Now you can refrigerate them for an hour, I couldn't find enough patience to do so.)

Bake for 40-50 min. When the rugelach are done, the outside will be crisp and golden. Let cool completely before eating (if you can). Enjoy, I know you will.


Friday, March 26, 2010

The BEST chocolate chip cookies (so far)


Last Saturday I woke up and just had to make cookie dough. I just had to. Even though we were going for breakfast to an adorable place with an amazing spinach, mushroom, gorgonzola omelette...

It all started with these cuties...


Aren't they the most adorable measuring cups ever? Yes, they are old, that's why...

Folloing the advice from The New York Times, that recommends refrigerating the dough for at least 24 hours... I stuck in the freezer until the day after...

Oh yeah, you might want the recipe! I borrowed it from Smitten Kitchen

2 cups all-purpose flour
1/2 teaspoon baking soda
1/2 teaspoon salt
3/4 cup unsalted butter, melted
1 cup packed brown sugar
1/2 cup white sugar
1 tablespoon vanilla extract
1 egg
1 egg yolk
2 cups chocolate chips (I used big bittersweet ones)

Preheat the oven to 325 F whenever you're ready to bake. Either right away or after refrigerating, which I strongly strongly recommend.

Melt the butter and cream the sugars in it. Add the egg and egg yolk, beat well and add the vanilla extract. In a bowl mix the dry ingredients and then stir them in the butter mix. Stir in the chocolate chips mixing them with a spoon/spatula.

Now cover the dough with plastic wrap and refrigerate for 24 hrs. Or not.

Bake for 15 minutes (yes they actually take that long to be done, remember is a 325 oven, not a 350).

And then bite...


And enjoy that melted chocolate, that crisp but chewy mix of flour and butter... Enjoy them with coffee or milk or plain...

See I couldn´t resist taking a bite while taking pictures...

Saturday, February 27, 2010

For the love of cranberries

My love story with cranberries was love at first sight. Unfortunately I didn't even know of the existence of this delicious round little things until I moved to the US. Apparently some countries in Europe have them, but Spain didn't until pretty much a year ago and they definitely don't have the fresh stuff.  (did i say they? i guess i'm an adopted american now).

Anyway, as soon as I tried them... I fell in love. Needless to say, cranberry sauce is one of my favourite Thanksgiving dishes. I could just eat tablespoons of it. Plain tart yummy cranberry.

The dried sweetened ones go perfect in my salads and... combined with some oatmeal... a little healthier breakfast cookies!


Fast, easy, delicious cookies!

3/4 cups all purpose flour
1/2 teaspoon baking powder
1 stick of butter
1/2 cup dark brown sugar
1 egg
1 1/2 cups old fashioned oats
1 cup dried sweetened cranberries

Preheat oven to 350 F
Cream butter and sugar in a bowl until fluffy. Add the egg and mix well. Stir in the baking powder and flour. Don't overmix. Fold in the oats and cranberries. It will look like there's no way in hell you're gonna get all those cranberries incorporated in the dough, but don't worry, they will stick to the cookies. Drop the dough by 2 tablespoonfuls in a cookie sheet. Flatten them as they won't get flat through baking. Bake for 10 min or until slightly brown on the bottom.


They are so easy and yummy you'll be making them over and over. 


Saturday, February 20, 2010

Tropical peanut butter cookies

What do you think about when you think about tropical?

Coco-loco... that is, coconut!

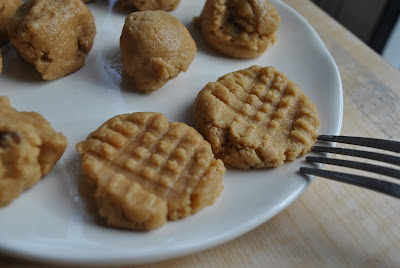
Now look at them, at those little beauties with a criss-cross pattern on top

what, you don't see any difference between them and a regular PB cookie? oh well, the difference is in the inside! and its name is...

Coconut peanut butter! which is nothing else but butter made of peanuts and coconut...


As you can see, the texture is not the same as in regular peanut butter, actually it's a bit hard to work with when it's at room temperature. But if you heat it up for a bit... you smell heaven... a mixture between regular PB smell and the bliss of coconut scent which got transformed into delicious cookies. 

Now, if you don't have access to coconut peanut butter or just don't want to buy it (i got mine as part of a prize i won on a blog), I bet adding a bit of coconut oil, coconut cream or coconut milk to the regular peanut butter cookie recipe does the trick. Try it! It's a great flavor combination that your taste buds need to explore. 

1/2 cup coconut peanut butter
1/4 cup regular peanut butter (for softness and more fat)
1/2 cup butter
1 1/2 cups of flour
1/2 teaspoon baking powder
1/2 cup dark brown sugar
2 eggs

Preheat oven to 350 F
Cream the butters and sugar together until creamy and smooth. Beat in the eggs one at a time. Add the flour mixing well with a spatula. You should be able to roll the dough into balls with your hands without it sticking. (I used a 1/2 tablespoon measure to scoop out the dough). 

Once you have your round and shiny balls, make the criss-cross pattern on them... why? I don't know, for fun or for good looks... 


Bake for 10 min or until set. 
Enjoy, lick your fingers, taste that hint of coconut and fall in love with it... 


Tuesday, February 16, 2010

Breakfast sconey cookies

I wanted to make chocolate chip cookies for my friend J and I wanted to try something new. I let Kim from Lovin' from the oven guide me (I totes love her blog)  with her recipe for the classic cookie. I have to say, the result wasn't good this time. I got a sconey cookie instead of a chewy one and the cookies didn't flatten at all, so they were pretty thick.  J named them 'breakfast cookie' because they are the kind of cookie you want to dip in cafe-au-lait...

Now, aside from the scone-like texture, they tasted great! I added dark chocolate chunks instead of semisweet chips, which gave them a nice kick...


Checking the recipe again, I'm wondering if the problem was that I didn't refrigerate the dough... hmm... well, I might give them another shot...

Here's the recipe, that I slightly adapted from the original

2 cups all-purpose flour
1/2 teaspoon baking soda
1/2 teaspoon salt
3/4 cup unsalted butter, melted
1 cup packed brown sugar
1 tablespoon vanilla extract
1 egg
1 egg yolk
1 dark chocolate bar chopped in chunks

Sift together the flour, baking soda and salt; set aside. In a bowl, cream together the melted butter and brown sugar. Stir in the vanilla extract, egg, and egg yolk and beat until light. Add the dry mixture. Refrigerate the dough for at least an hour. (this is what I didn't do...)
Preheat the oven to 325 F
Drop by tablespoonfuls and bake for 10 min or until golden on the edges.

Monday, January 18, 2010

Snickerdoodles

Most americans like cinnamon, you find it everywhere, cookies, cakes, cereal... snickerdoodles are cinnamon cookie queen... I topped mine with a little suprise... cinnamon almonds!

They where chewy, yummy and almond was the crunch...


2 1/4 cups all purpose flour
2 teaspoons cream of tartar
1 teaspoon baking powder
1/2 teaspoon salt
1 cup butter  (2 sticks), softened
1/2 cup brown sugar
2 large eggs

For the coating:
1/2 cup white sugar
2 teaspoons ground cinnamon

Preheat oven to 350 degrees F

In a bowl, mix flour, cream of tartar and baking powder. Set aside. In a separate bowl mix butter and sugar until creamy. Add the eggs one at a time and mix until well incorporated. Add the dry mixture slowly mixing well. Refrigerate the dough for 30 min.
In the meantime, combine in a bowl, sugar and cinnamon and mix well to make sure it's a homogeneous mixture. Once the dough is chilled, drop tablespoonfuls of it into the sugar/cinnamon mix until well coated.


Optional: place a cinnamon almond in the middle.

Bake for 9-11 min until the edges are golden brown.


Chocolate bliss

Chewy bittersweet chocolate cookies with sweet white chocolate chips, they melt in your mouth!


White chocolate chip chocolate cookies


For a change, I didn't use a typìcal chocolate cookie recipe, instead I modified the traditional chocolate chip cookie recipe to create this yummy treats...

Ingredients

2 cups of flour
1/4 cup cocoa powder
1 teaspoon baking soda
1 teaspoon of salt
1 cup of butter
3/4 cup granulated sugar
3/4 cup brown sugar
1 teaspoon vanilla extract
2 large eggs
1 cup white chocolate chips

Preheat oven to 375 F

In a bowl, cream butter and sugar until smooth. Add eggs one at a time and vanilla extract. In another bowl whisk together flour, cocoa powder, salt and baking powder. Make sure they are well combined.
Add the dry mix to the butter mix one cup at a time while mixing. Stir in the chocolate chips.
Bake 9 to 11 min until the eggy texture is gone. (when you press the cookie and it retains the shape). Do not overbake!

Wednesday, January 13, 2010

If life gives you lemons, bake with them!

I'm all into lemony stuff recently... I really wanted to learn how to make whoopie pies and new year's eve was the perfect excuse... but my list of lemon desire included lemon poundcake, which wento to one of my labmates.


Lemon whoopie pies

Maybe not on the beautiful side but definitely on the tasty one...

For the pies:
1 1/2 cups flour
1/2 teaspoon baking powder
1/4 teaspoon baking soda
1/4 teaspoon salt
6 tablespoons unsalted butter, at room temperature
1 cup sugar
1 tablespoon lemon zest, finely grated
1 egg
1 tablespoon freshly squeezed lemon juice
1 teaspoon vanilla
1/2 cup milk

For the filling:

Half a package cream cheese (4 ounces)
1 1/2 cup powdered sugar
Juice of a lemon

Note: I added also a tablespoon of concentrated lemon juice (the store bought one). The amount of lemon and sugar is totally relative to how much you like to taste both the cream cheese and the lemon. Adjust to taste.


Preheat oven to 350F
Beat together sugar and butter until fluffly. Beat in the egg, vanilla and lemon zest. Add the milk and mix well. Stir in the flour, baking powder and baking soda. Mix until all the flour is incorporated. Do not overmix.
Place tablespoons of dough into a greased pan and bake for about 10 min, until golden on the edges.

To make the filling beat together the cream cheese (better if softened at room temperature), sugar and lemon juice. Place by tablespoons or with a piping bag on one pie and cover with another pie. If the filling is too liquid, harden by refrigerating for half an hour.


Lemon poundcake

1 1/2 sticks butter
1 1/2 cups granulated sugar
1 1/2 cups flour
Zest from 1 lemon
3 large eggs
1 teaspoon vanilla extract
2 tablespoons cream cheese

Preheat oven to 325 F
Cream butter and sugar together. Stir in the lemon zest. Add the eggs one by one and the vanilla extract and keep mixing. Mix in the cream cheese until smooth. Add the flour. Place dough into a greased loaf pan.
Bake for 1 hr and 15 min. Or until a toothpick comes out clean.


Saturday, January 2, 2010

Flourless chocolate cookies

Chewy, yummy, chocolatey, butter free, flourless... they don't go bad because of the lack of butter and they taste like brownies!


2 3/4 cups walnut halves
3 cups confectioners’ sugar
1/2 cup plus 3 tablespoons unsweetened Dutch-process cocoa powder
1/4 teaspoon salt
4 large egg whites, at room temperature
1 tablespoon pure vanilla extract


Friday, January 1, 2010

Christmas cookie giveaway part 2


The second set of recipes from the cookie boxes my friends got for xmas.

Orange coconut cookies

They don't look amazing but I promise these were the stars of the party... chewy, flavorful, with a crunch from the coconut... 


2 cups all-purpose flour
2 tablespoons orange zest
1/2 teaspoon salt
1 cup butter
1/2 cup granulated sugar
1/4 cup packed light brown sugar
1 large egg
1 teaspoon vanilla extract
1 cup shredded sweetened coconut

Preheat oven to 350 F

Combine the flour, zest, and salt in a large bowl and whisk until combined.  Beat together butter and sugars  until fluffy. Add the egg and vanilla and mix until just combined. Add the flour and mix well. Stir in the coconut and mix. Refrigerate the dough for about an hour. Drop by tablespoonfuls in a cookie sheet and bake for about 10 min until edges are golden.


Cranberry walnut bars


The easiest bars you've ever made! And if you're not a fan of cranberries or walnuts you can use any other type of dried fruit/nut you like. Warning! they are yummy but sticky!


1/2 cup (1 stick) salted butter, cut into pieces
1 1/2 cups graham crackers crumbs (you can crush them with whatever you like, food processor is the cool way but I used a hammer ;) )
1 1/2 cup of walnuts, chopped
1/3 cup condensed milk

Preheat oven to 350 F

Melt the butter in the microwave and stir in the graham cracker crumbs. Mix well and place in an oven pan forming a crust (this will be the crust of the bars). I made a thin crust but I think next time I'll try with a thicker one so the bars hold shape better. On top of the crust, spread the cranberries and walnuts. Drizzle the condensed milk on top and press with a fork so that everything sticks together. Bake for 25 min until the top is golden brown. Important!!! Let them cool well before cutting, otherwise it's really hard to get nice looking bars.

Sunday, December 27, 2009

Christmas cookie giveaway Part I

Sometimes finding the appropriate Christmas gift is pretty much a nightmare, so this year I decided to give my sweet tooth friends a bunch of nicely packed Christmas cookies. Here are the recipes for my christmas tree classic sugar cookies and the coconut macaroons. I have to say it was the first time I made coconut macaroons and I was really happy when one of my labmates told me they were the best she'd ever tried!


Christmas tree sugar cookies


3 cups all purpose flour
3/4 teaspoons baking powder
1/4 teaspoon salt
1 cup unsalted butter
1 cup sugar
1 egg
1 tablespoon of milk

Preheat the oven at 350 F

Beat together butter and sugar and when fluffy, add eggs one at a time. Add the milk and mix well. Add the flour one cup at a time and the baking powder and salt. Once the mix is ready chill in the refrigerator for 1 hr. Roll the dough to a thickness of about half an inch. Wax paper helps a lot on the rolling along with flour.
Bake for 10-12 min until slightly brown on the bottom. 

For the icing
Beat toghether 1 1/2 tablespoons of butter and 2 cups of confectioners sugar. Add 3 to 4 tablespoons of milk and 1 teaspoon vanilla extract. For color add food coloring. I sprinkled mine with green sugar.


Coconut Macaroons


2 egg whites
2/3 cup granulated sugar
2 teaspoons vanilla
2 2/3 cup shredded coconut

Preheat oven at 350 F

Beat the egg whites until white, stiff and fluffy. Remember that a clean bowl helps with that. Add the granulated sugar and keep beating until it has the consistency of icing. Add the vanilla. Stir in the coconut and mix with a spatula. Don't overmix to avoid the egg whites from deflating. I used a pastry bag to get more even coconuts but you can also drop them by tablespoonfuls on a baking sheet. Bake for about 15 min, until tops are golden brown.

Sunday, December 20, 2009

Chocolate crinkles

Add a little twist to the typical chocolate cookie


1/4 cup butter, softened
1/4 cup unsweetened cocoa powder
4 tablespoons oil (example: canola or vegetable)
2 cups sugar
4 eggs
2 teaspoons baking powder
1/2 teaspoon salt
3 cups all-purpose flour
powdered sugar for rolling
  1. Preheat oven to 300 degrees.
  2. Combine all of the ingredients in a mixer bowl. Mix well.
  3. Chill dough for at least an hour (highly recommended, otherwise the dough is way to sticky to work with it)
  4. Make a dough ball and drop it into the powdered sugar. Coat the balls. (once they are dipped in the powdered sugar they are much easier to handle)
  5. Place on a cookie sheet. Bake 12-15 minutes.

Thursday, December 17, 2009

Italian delicacies


As most of you know, biscotti means double baked. And this is pretty much the only secret of these delicacies that I had the pleasure to find very easy to make. Plus, you can make biscotti of whatever you imagine, sweet or savory, with nuts, dried fruit, chocolate... try it!

CRANBERRY PECAN BISCOTTI
2-1/2 cups flour
3/4 teaspoon baking powder
1/2 teaspoon salt
3/4 cup butter, softened
1 cup sugar
2 eggs
1-1/2 teaspoons orange extract
1/2 cup pecan (or any nut you like)
1/2 cup cranberries (again, any dried fruit works)
    Preheat oven to 350 degrees F.

    In a bowl cream butter and sugar until fluffy.  Add eggs one at a time and keep mixing. Gradually, add the flour, salt and baking powder to butter mixture. Mix until smooth and add the pecans and cranberries.

    Evenly divide dough into 2 portions and shape them like bread loaves. Place on baking sheet. Bake for 30 minutes. Remove from oven. Let them cool down for about 15 minutes. Cut loaves diagonally into 1/2 to 1-inch slices with a serrated knife. Line slices back on baking sheet. Bake for five more minutes on until they look slightly golden. Turn the biscotti over and bake for another 5 minutes.

    Adding chocolate dip is optional. If you want to do it, just let the biscotti cool down completely. Then melt about half a cup of chocolate chips in the microwave and dip the biscotti in. Let them cool until the chocolate is firm and they are ready to go.